
2017 MHA Annual Meeting
36"
Castable Refractory Oven Experiment
People
36"
Castable Refractory Oven Experiment
Kachel
Workshop
Large
Double Bell
Squirrel
Tail Oven
Pat Manley
Oven
Testing
Heater by AFPMA
Firetube
Multifunctional Masonry Heater
Batch
Rocket Cookstove and Heater
HMED 22"
Contraflow
Small
Finnish Contraflow for Beginner Masons
Quick Grill
by Chris Prior
Tulikivi
TU-2200 Top Vent
Ecostove
Tiileri Brick Heater Kit
Archguard demo
Presentations
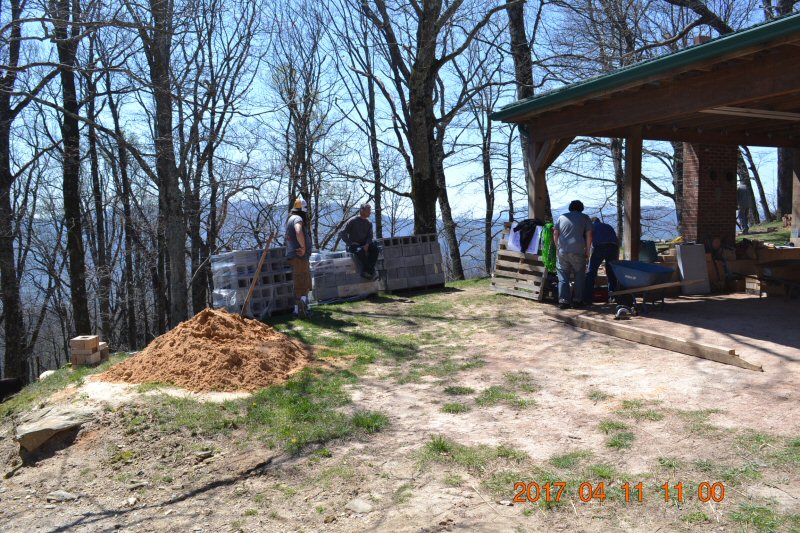
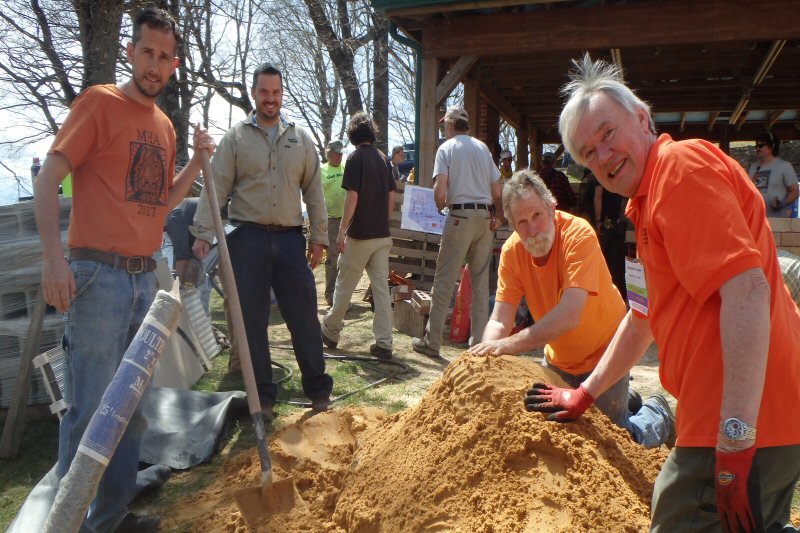
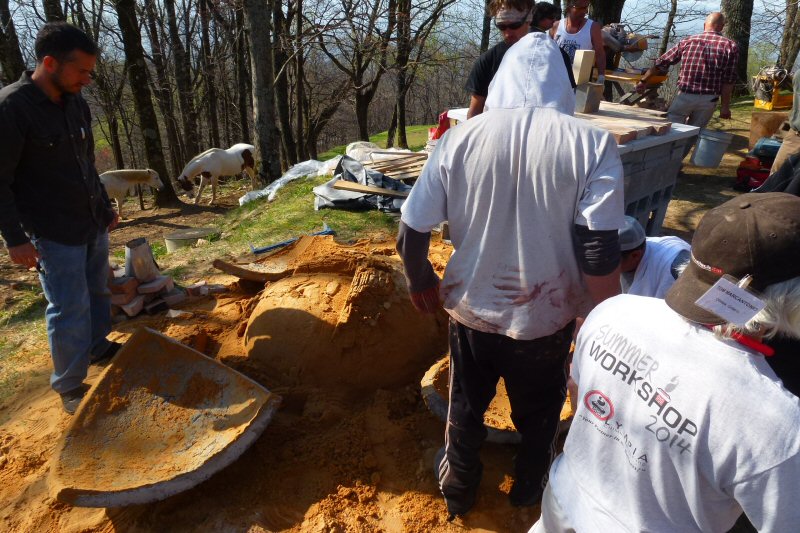
Pile
of damp sand. Sand that packs well is the best. This sand was OK, but
not great.
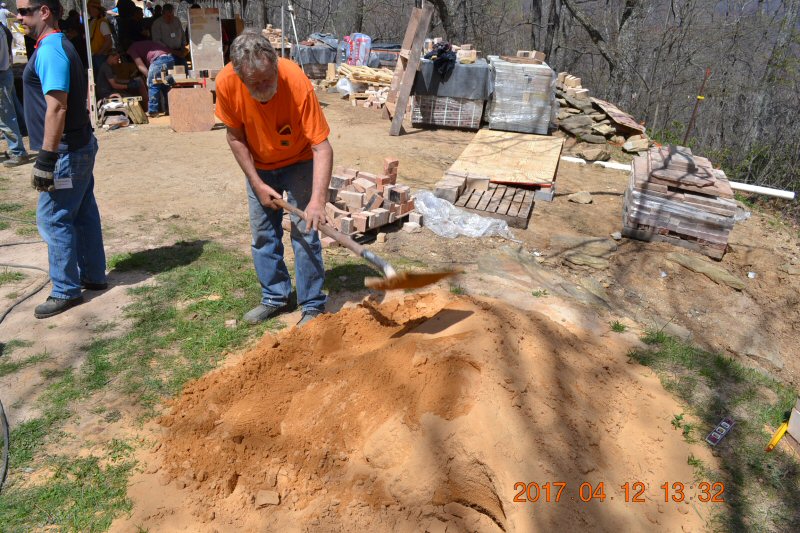
Compacting
the sand.
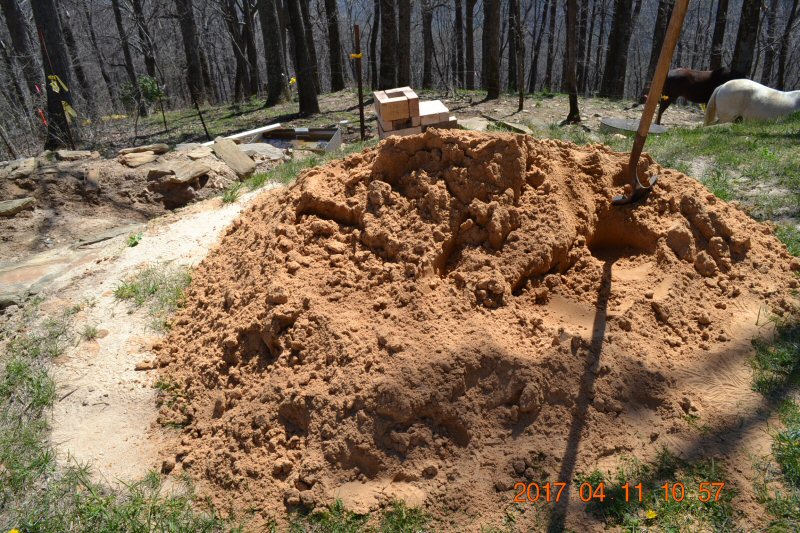
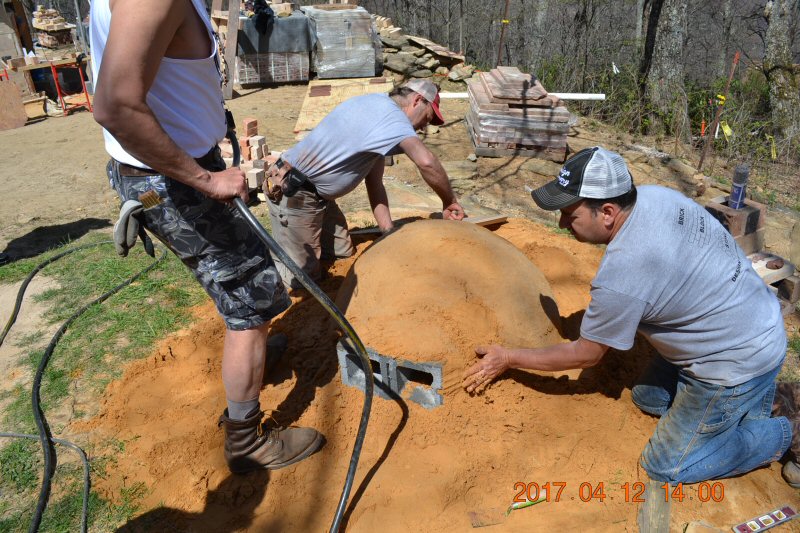
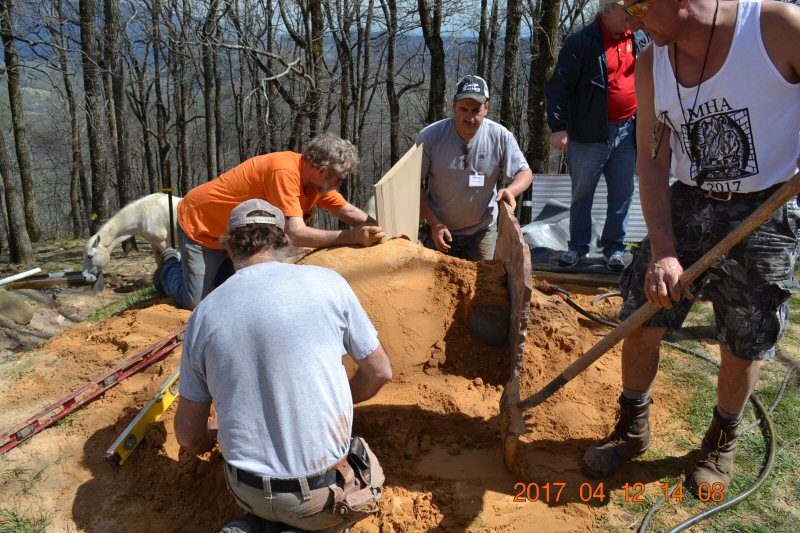
Starting
to form it into a 36" hemisphere shape.
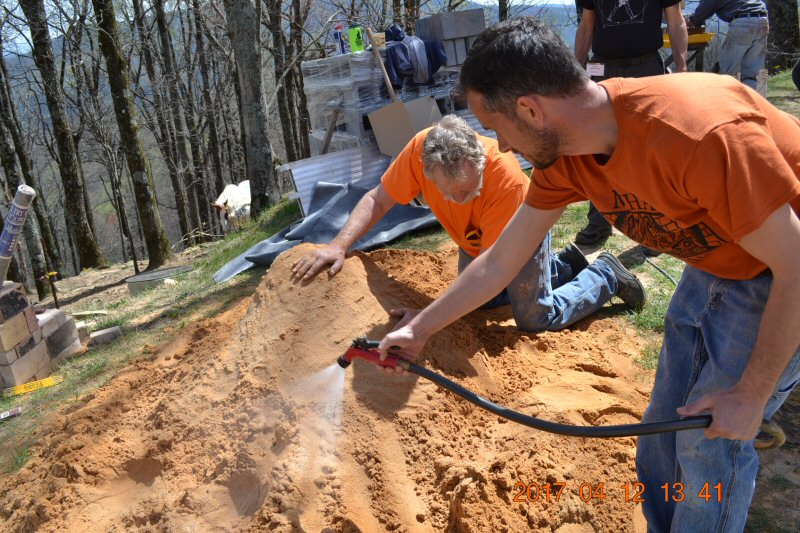
Making
sure it is damp and there is no dry sand, which does not pack.
Establishing
the baseline
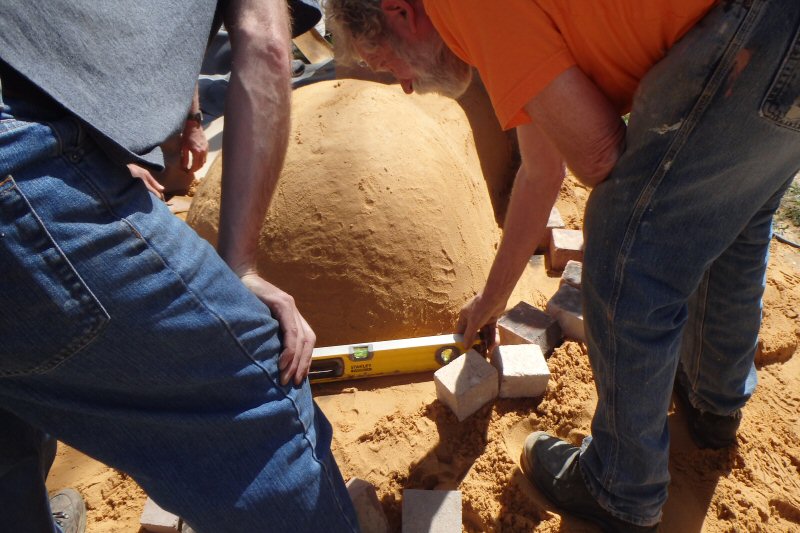
Levelling
the baseline
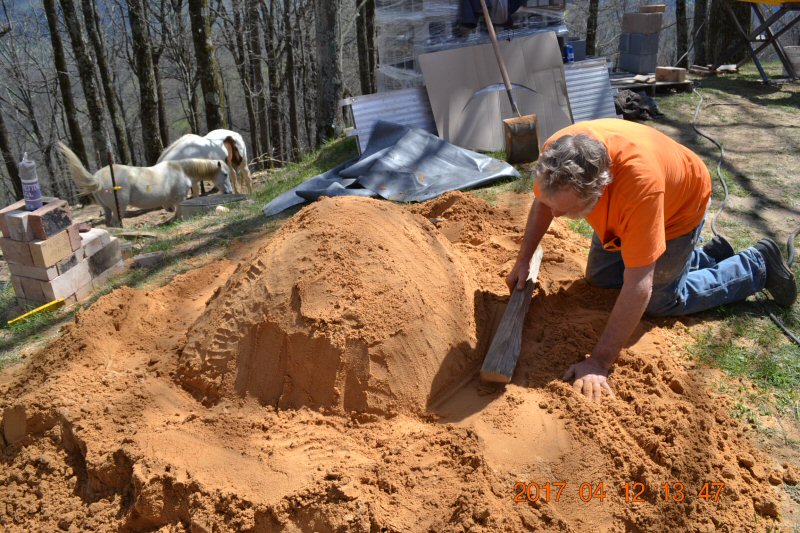
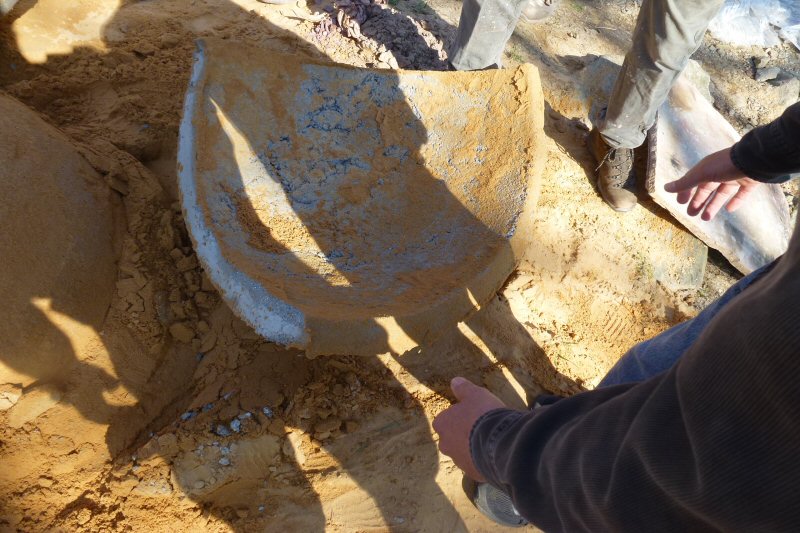
Forming
the front opening.
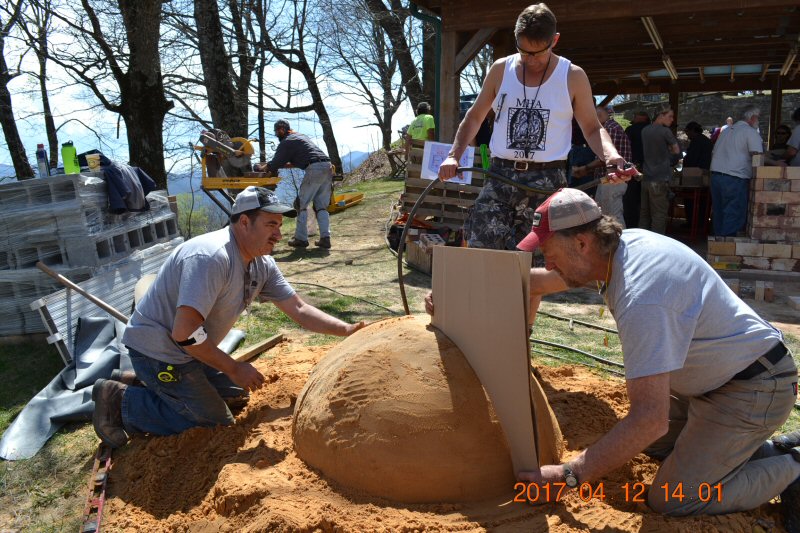
An
impromptu cardboard template was very handy for getting the shape.
Forming
the front edge of the oven opening.
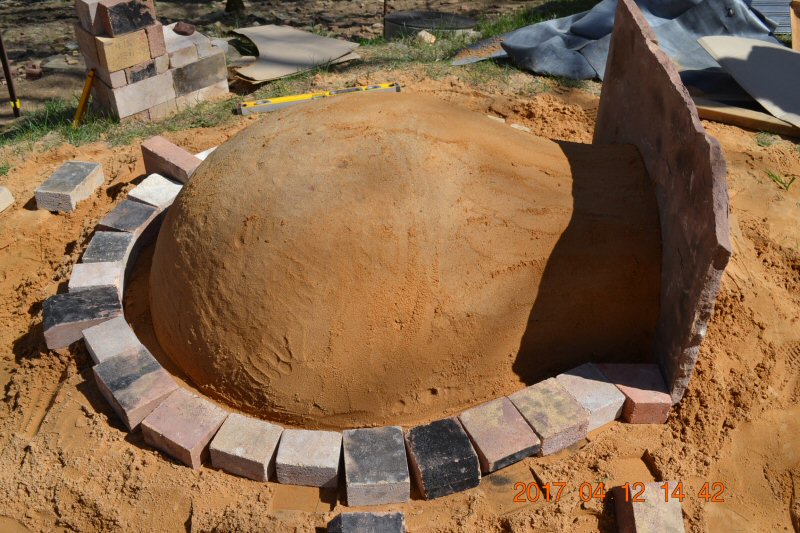
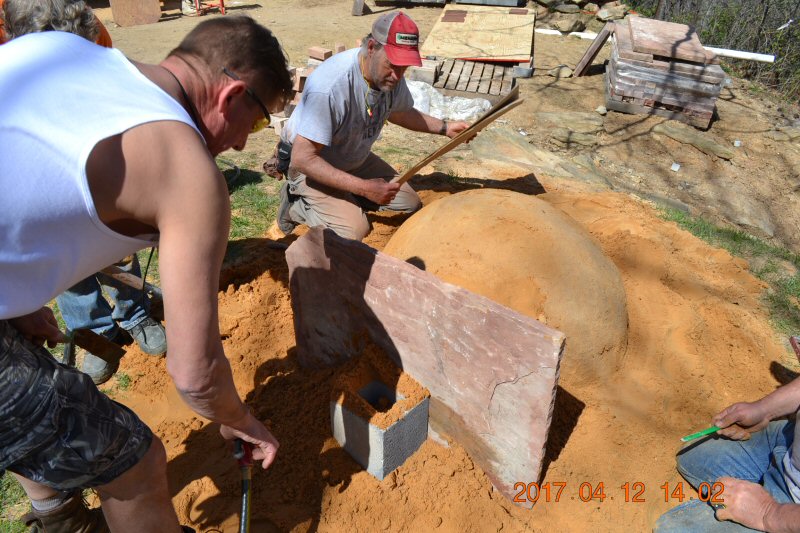
Forming
a dam at the bottom to delineate the 2" castable concrete thickness. We
calculated that it would take 8 bags of castable refractory
(50 lbs each).
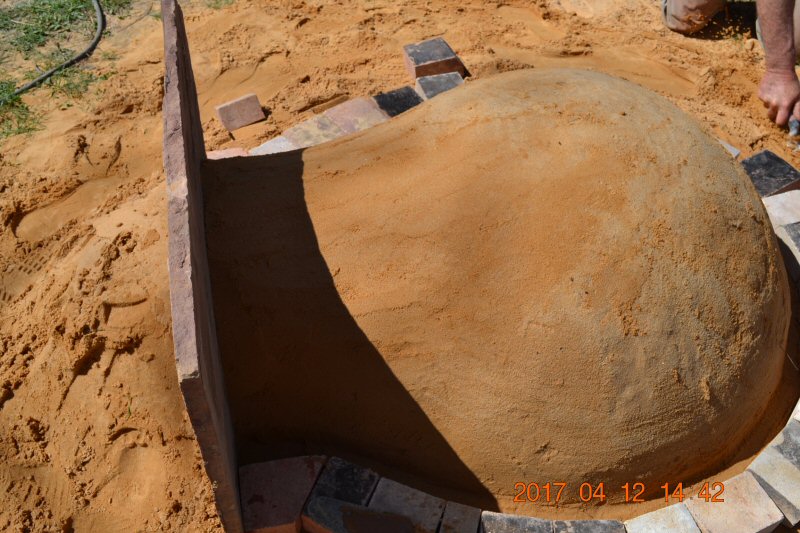
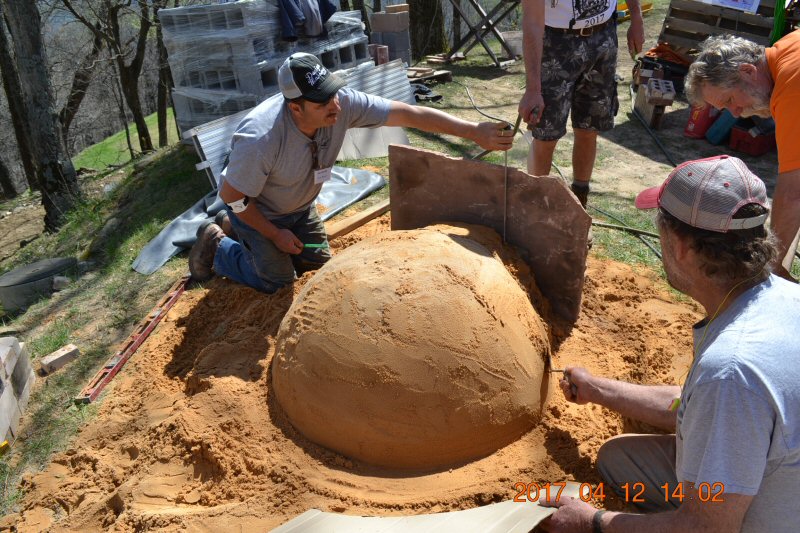
Damp
sand form is ready.
Sand
casting is a technique that was widely used in the 1930's to cast full
dimension artificial stone. The basic idea is that you use a very
wet concrete mix, and that the sand will suck out the extra water,
giving you a normal strong concrete (extra water weakens concrete,
and in particular castable refractory, which is high heat concrete).
Normally, you would make a mold into a mass of damp sand. In this case,
we have reversed the procedure and are plastering onto a form. We
discussed this on the MHA members Yahoo List, and wanted to see how it
would work.
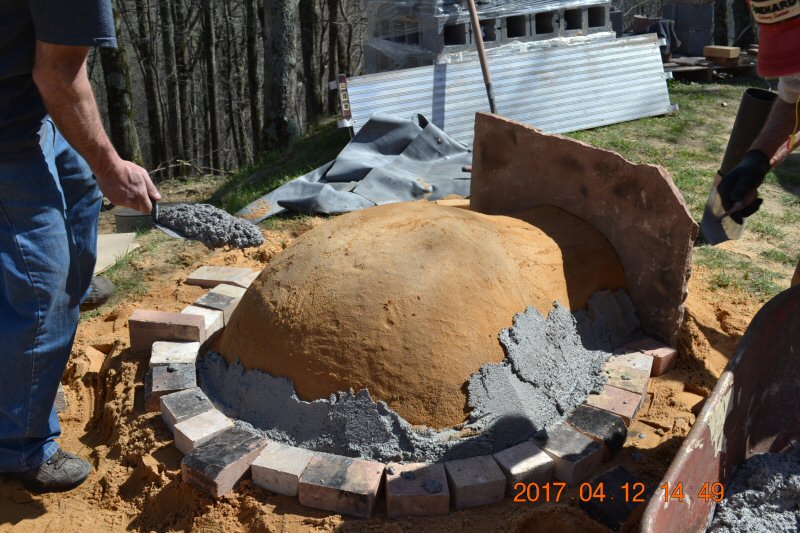
We
purchased the castable refractory at the Asheville pottery supply for
$40.00 per 50 lb bag.
It was "Econocast" manufactured by Pryor Giggey Co. Pretty much any
general purpose castable should work the same.
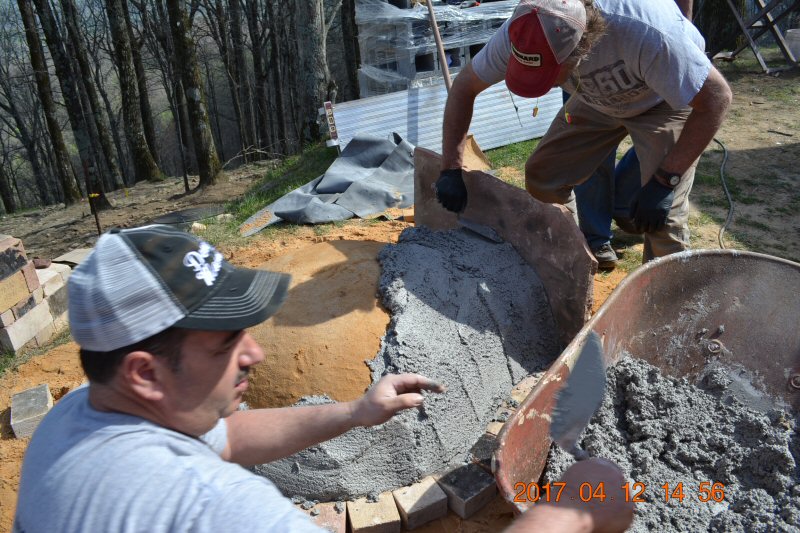
I made the first batch fairly runny, using the "ball
in hand test"
It
looked like there might be an issue with the concrete adhering to the
mold, so I made the second batch stiffer, more like normal "ball in
hand" consistency. Note that the first part is almost vertical, and the
hardest to do.
Further
up, we made a slightly wetter mix.

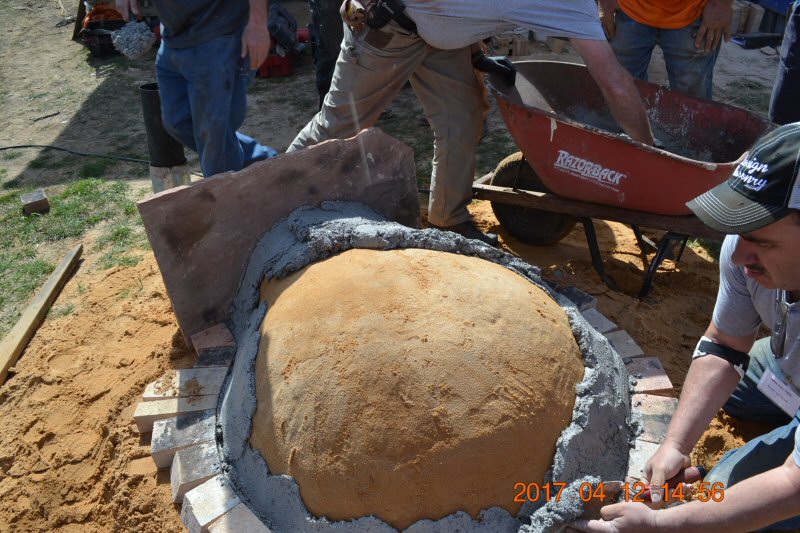
Pulling
the form for the front of the opening. The sand was sucking out the
water nicely, and the concrete was stiff enough to trowel.
A
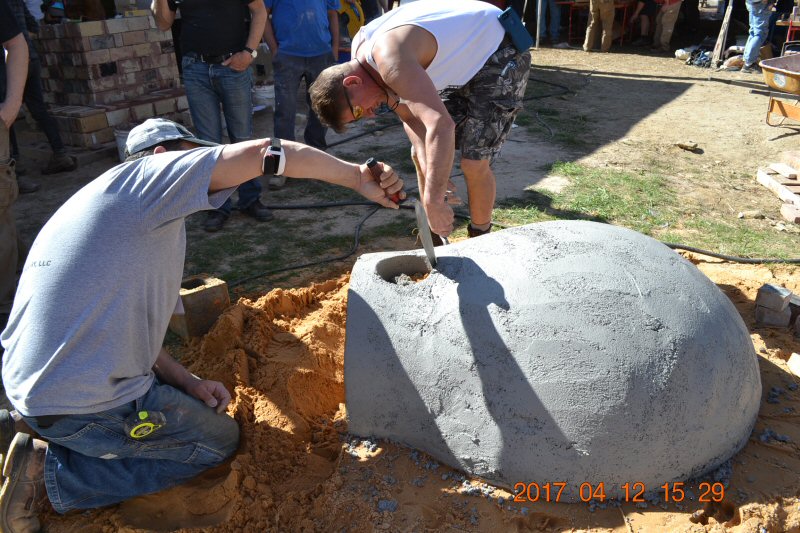
7" chimney opening was formed using a piece of pipe.
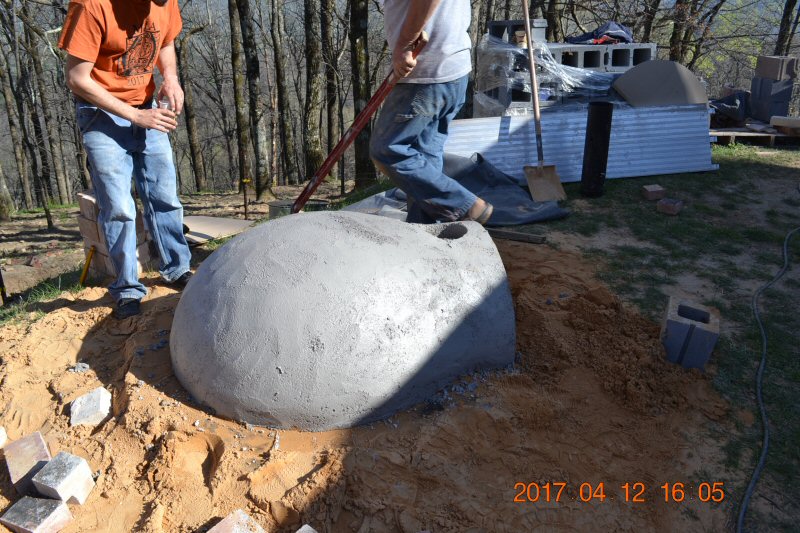
Finished.
You
want to resist the temptation to over-trowel it to a smooth finish, as
this retards the drying process. A wood float finish is
recommended.
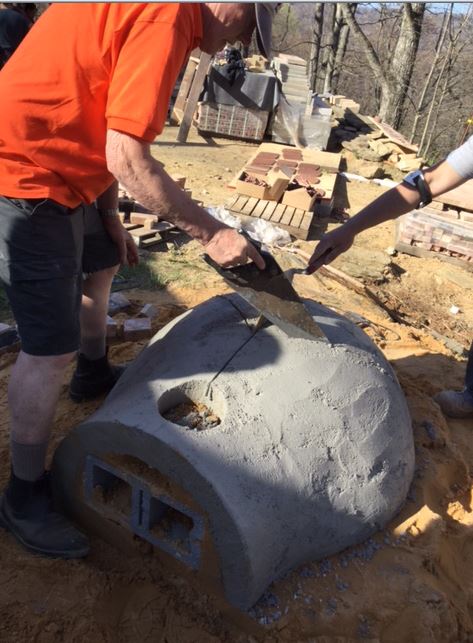
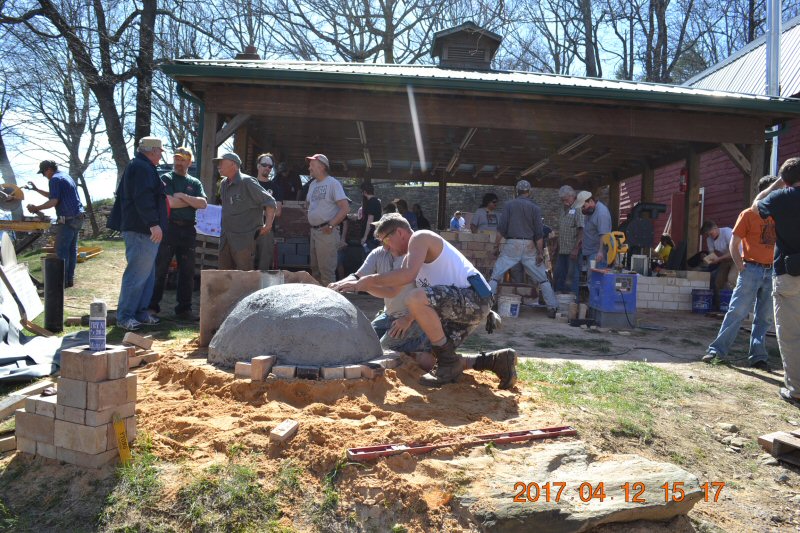
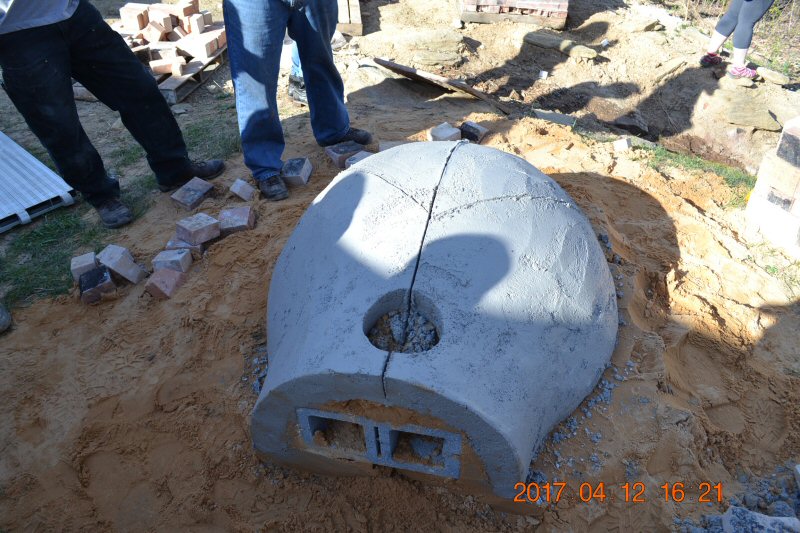
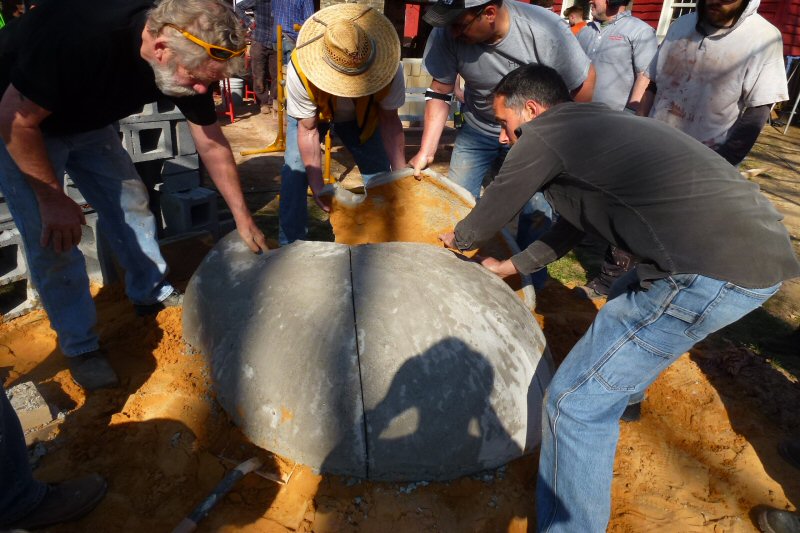
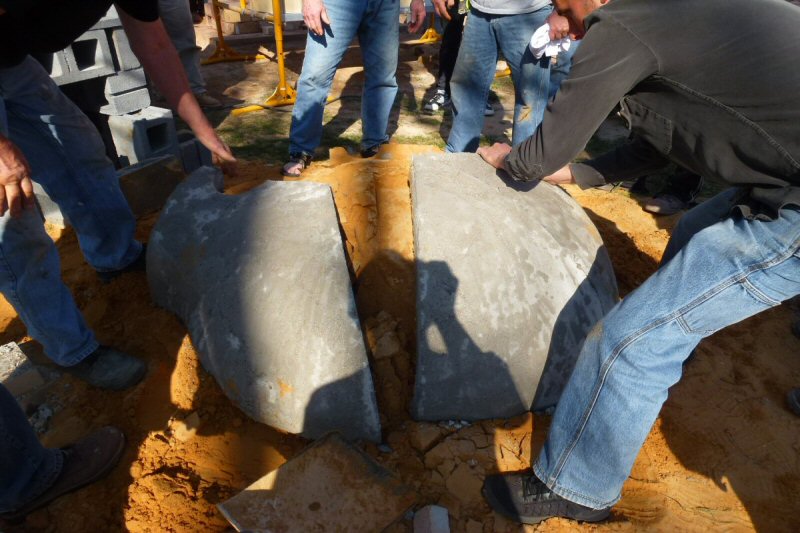
We
cut the oven shell into 4 pieces, using an old hand saw.
It
was left in the open air to dry until the first patches of surface
drying were apparent.
Then,
it was covered with plastic overnight
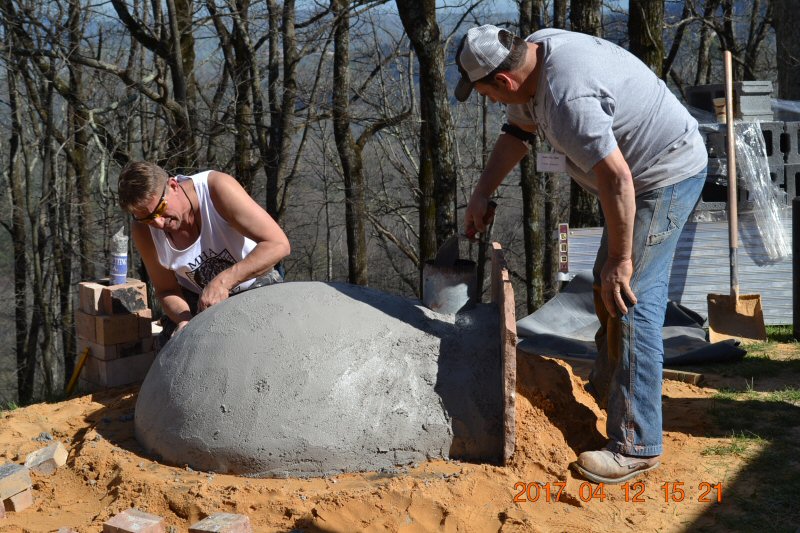
Castable
refractory uses calcium aluminate cement (fondue cement) as a binder.
This is a super
high early cement, and is fully cured in 24 hours..
The
next morning.

Notice
the honeycoming. This is from too stiff a mix.
In
discussion, the consensus was that there really was no issue with
adhering the wet mix, and therefore the mix could have easily
been wetter.
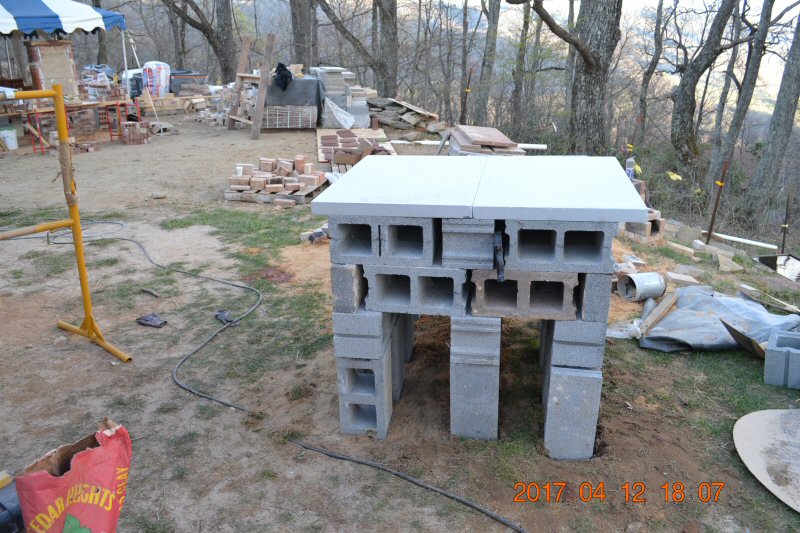
Oven
base with 2" calcium silicate board insulation.
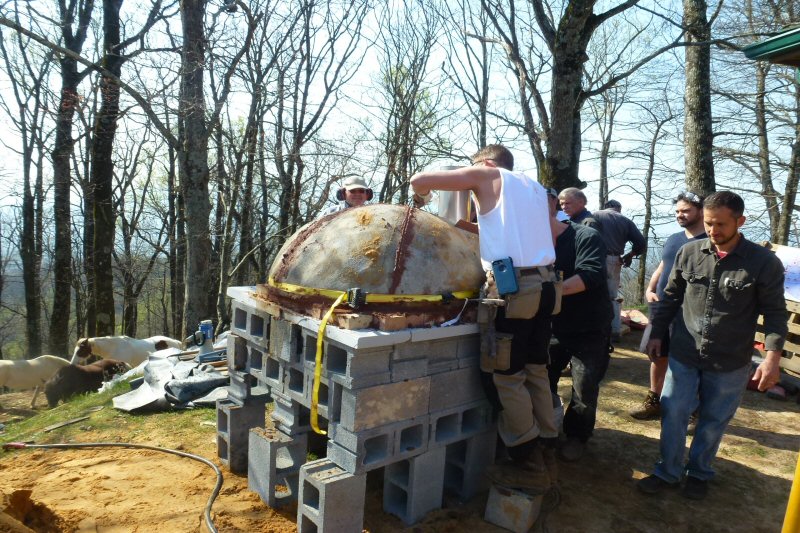
The
pieces were mortared together with clay-sand mortar.
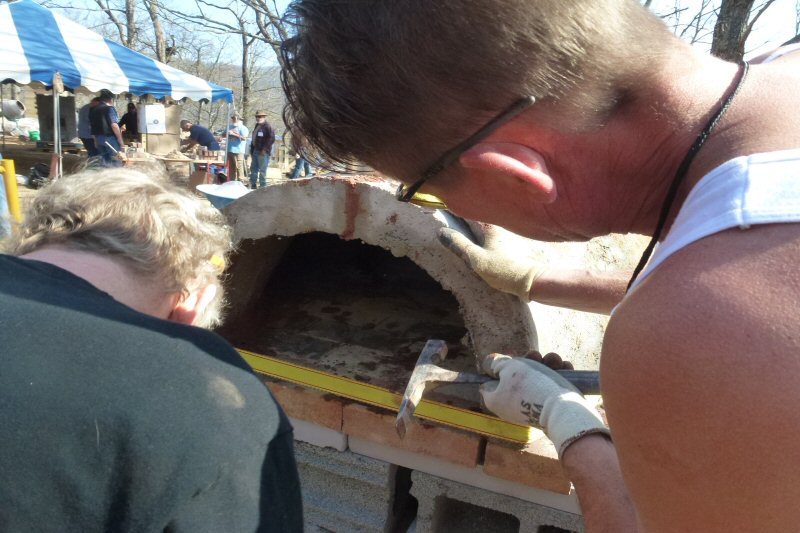
Cleaning
up the flash on the door edge.

Lighting
a curing fire on the morning of the pizza party (Friday)
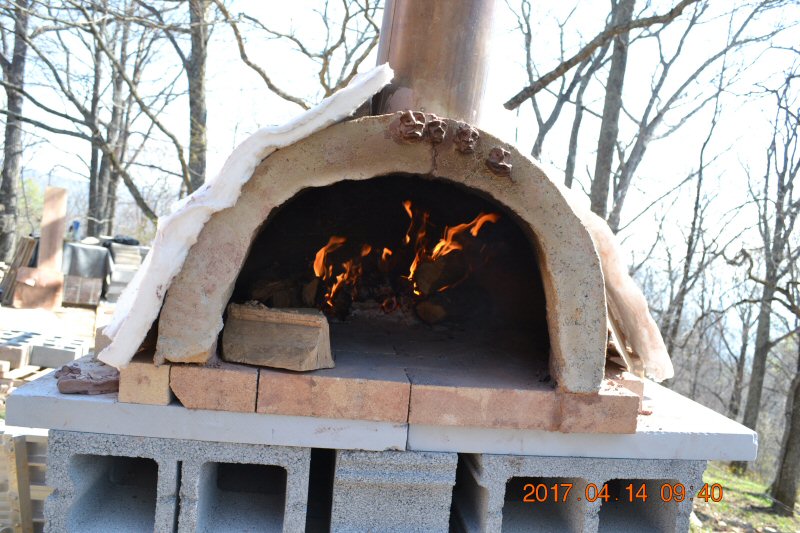
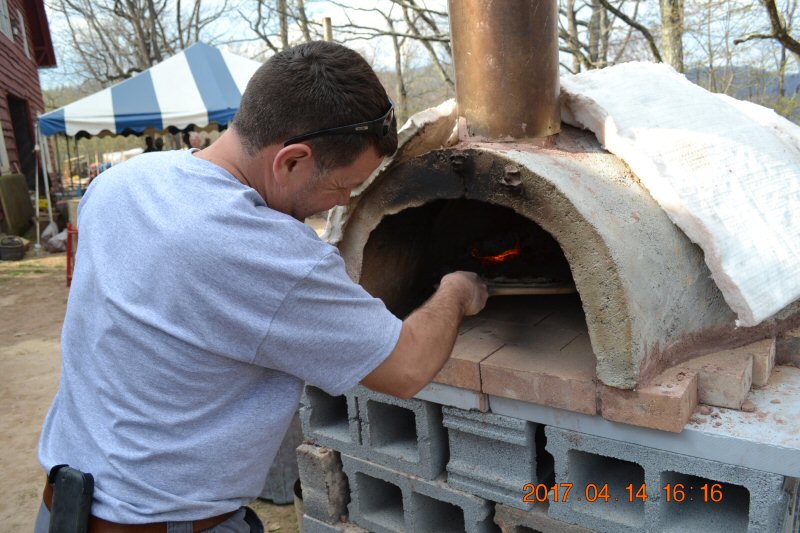
Fire
was kept on low all day, and then cranked up around 4:00 for the pizza
party.
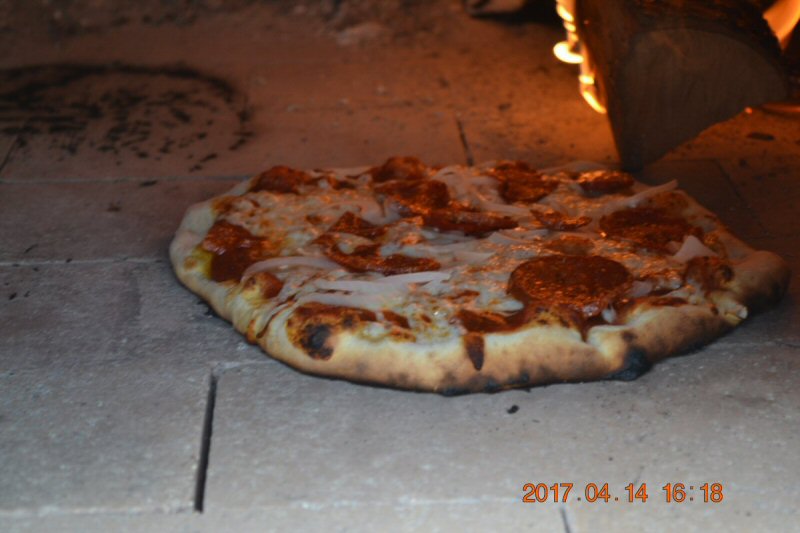

Success!
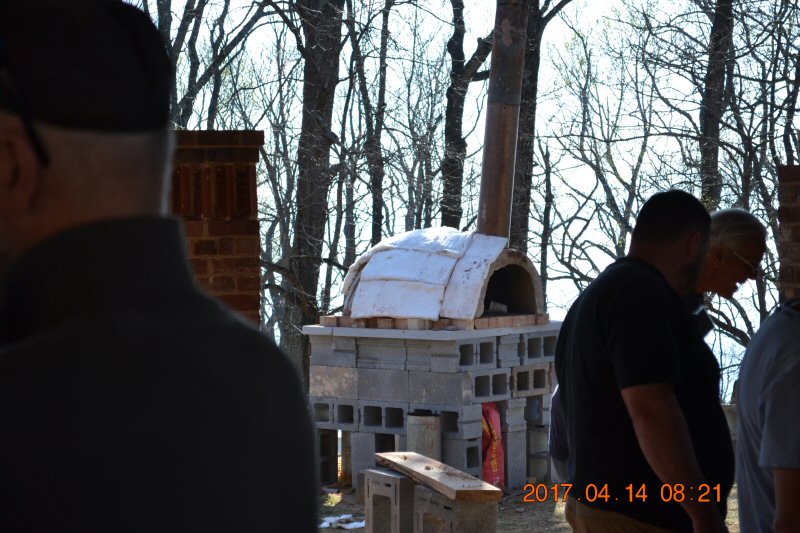
We
fired the oven very hard, to see if we could break it. We could not.
There were some small hairline cracks in the clay mortar joints,
which is exactly where you want them.
See
also:
2016 Photo
Report
2015 Photo
Report
2014 Photo
Report
2013 Photo
Report
2012 Photo
Report
2011 Photo
Report
2010 Photo
Report
2009 Photo
Report
2008 Photo
Report
2007 Photo
Report
2006 Photo Report
2004 Photo Report
2003 Photo Report
2002 Photo Report
2001 Photo Report
2000 Photo Report
1999 Photo Report
1998 Photo Report
1997 Photo Report
This
page was last updated on August 12, 2020
This page was created on April 18, 2017
Back
to: